Raspberry-Fig Crostata with Flo Braker and Leslie Mackie
Season 3 Episode 13 | 23m 59sVideo has Closed Captions
Demos for two wonderfully crunchy butter galettes and a raspberry-fig crostata.
Flo Braker, San Francisco Bay Area baker, author and cooking teacher, turns out two wonderfully crunchy butter galettes, one that's as a sweet treat with fresh berries and whipped cream, and another with tomatoes and savory herbs. Leslie Mackie, ownerof Seattle's Macrina Bakery, demonstrates a raspberry-fig crostata.
Problems with Closed Captions? Closed Captioning Feedback
Problems with Closed Captions? Closed Captioning Feedback
Raspberry-Fig Crostata with Flo Braker and Leslie Mackie
Season 3 Episode 13 | 23m 59sVideo has Closed Captions
Flo Braker, San Francisco Bay Area baker, author and cooking teacher, turns out two wonderfully crunchy butter galettes, one that's as a sweet treat with fresh berries and whipped cream, and another with tomatoes and savory herbs. Leslie Mackie, ownerof Seattle's Macrina Bakery, demonstrates a raspberry-fig crostata.
Problems with Closed Captions? Closed Captioning Feedback
How to Watch Baking With Julia
Baking With Julia is available to stream on pbs.org and the free PBS App, available on iPhone, Apple TV, Android TV, Android smartphones, Amazon Fire TV, Amazon Fire Tablet, Roku, Samsung Smart TV, and Vizio.
Visit the Julia Child Experience
Get recipes, read tributes from celebrity chefs, and more. Bon appetit!Providing Support for PBS.org
Learn Moreabout PBS online sponsorshipBoom!
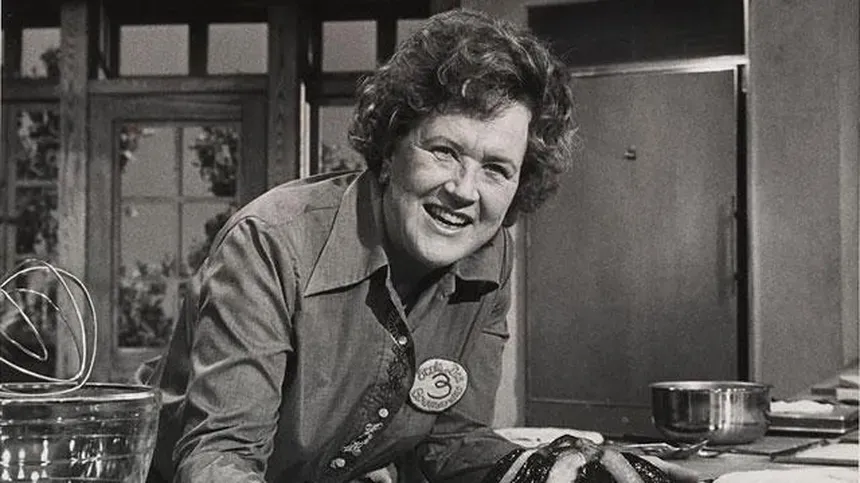
Hello, I'm Julia Child.
Welcome to my house.
What fun we're going to have baking all kinds of incredible cakes, pies and breads right here in my own kitchen.
Flo Braker, San Francisco baker turns out a crunchy, buttery galette and Leslie Mackie, owner of Seattle's Macrina Bakery demonstrates this luscious raspberry-fig crostata.
All on...
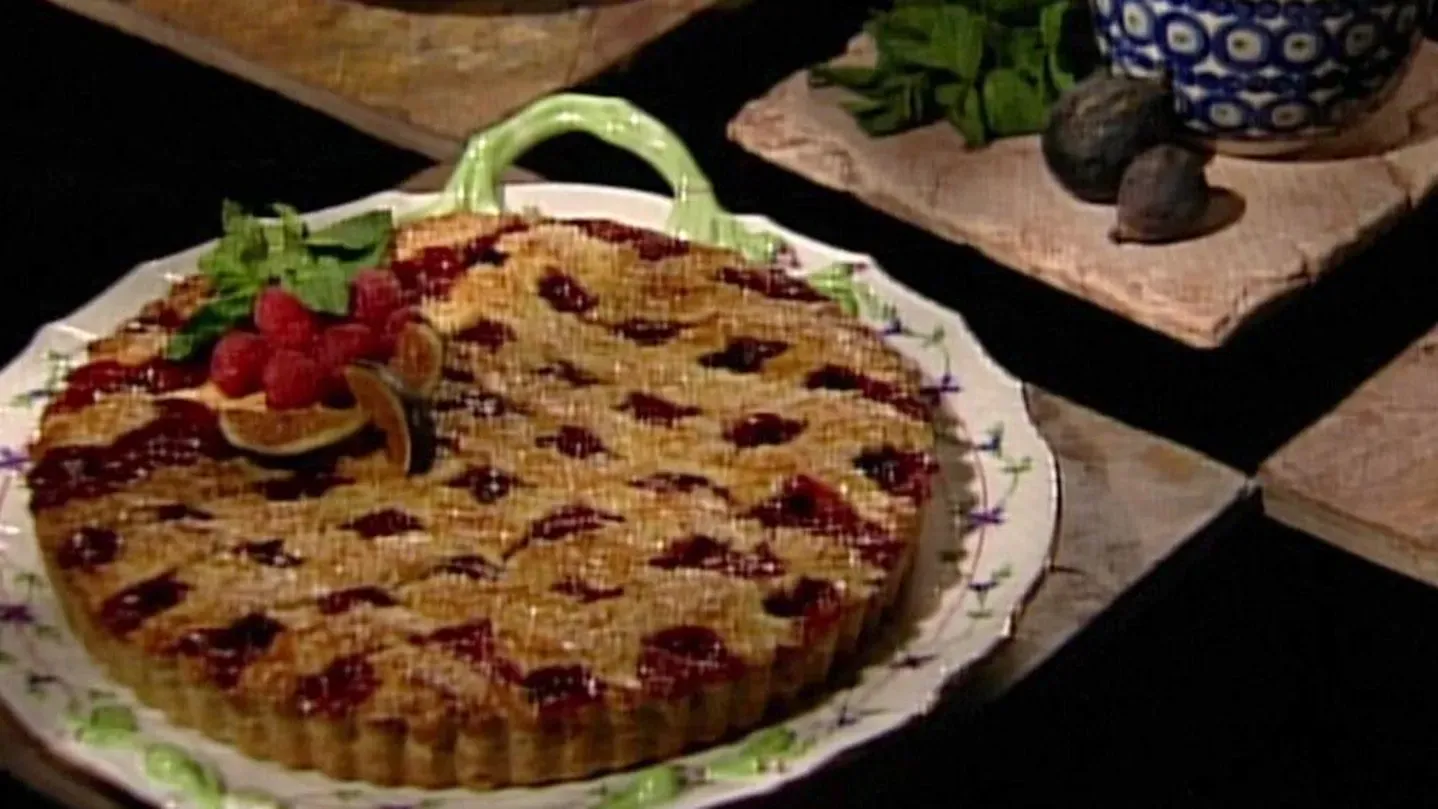
This is a fig and raspberry crostata.
As you see, there are the raspberries and there are the figs.
And it has a marvelous lattice crust and the crust is made out of sesame seeds and almonds, and this is an invention of our pastry chef Leslie Mackie.
Are we going to start with the dough, or what?
We sure are.
In the mixer we have two cups of all-purpose flour.
To that we're going to add the roasted sesame seeds.
We have a half a cup of roasted sesame seeds and a half a cup of roasted, chopped almonds.
They've been roasted with their skins on.
With their skin on.
That gives them more flavor.
We're also going to add in a half a cup of sugar.
Mm-hmm.
Do a fourth of a teaspoon of cinnamon.
And we're going to put a little zested lemon in it.
We're going to put like a eighth of a teaspoon in.
There we go...
Terrific.
We're going to mix that up.
I think this has a little salt in it, too.
One-fourth teaspoon salt.
All righty.
Let me sneak that in.
Okay, now we're going to cut in the butter.
I'm going to cut it into a little bit smaller size.
You always like to chop up the butter first, don't you?
I do.
It makes it easier to get to that crumb stage.
Mm-hmm.
Chilled, unsalted butter.
Mm-hmm... yep.
There we go.
All right, I'm going to break that up... just like so.
There we go-- now it's at the crumb stage.
So we've got two eggs here.
This is U.S. graded large eggs.
You always use large, don't you?
I do-- I always use large eggs.
Otherwise, I think it throws your measurements off.
Mm-hmm, and it calls for a little bit of vanilla... it gets a teaspoon of vanilla.
This is real, pure vanilla extract.
And I'm just going to pour that in and we're going to mix this just until it comes together.
We don't want to overmix it.
Great.
We're going to chill this now for a couple hours.
This has a fair amount of butter in it so it's a little difficult to work with.
We'll just kind of make it into a... square.
And, again, I'll just date that-- we can date that and then put that in the fridge.
Mm-hmm, this can be made way ahead, I presume.
You can freeze it.
Good.
Yep... absolutely.
Okay.
While the dough is chilling, onto the filling.
We're going to make a filling here with fresh figs and fresh raspberries.
I've cut the figs up in quarters.
Here, we'll just do a quick one here.
These are really a wonderful fruit and aren't used that often, so... not for baking so much.
They're expensive, for one thing.
That's true.
I'm just cutting them in quarters... just like so.
We're going to discard those little... tops.
So I'm putting in half of the fruit here.
We're going to make a little sauce.
We're going to season and thicken the fruit.
That way we can kind of determine the amount of flour.
Those figs are just perfectly ripe.
Aren't they nice?
We have like 12 ounces of figs and 12 ounces of fresh berries... fresh raspberries.
And you can use a different berry if you had other ones available.
So what we're going to put in with this fruit mixture is a quarter of a cup of brown sugar and a half a cup of sugar and we're going to put a little lemon zest in here.
Just a little bit, mostly lemon juice.
I'm just going to put a touch in.
That's just an itty bit.
Yep.
A small pinch.
A small pinch.
Cut this in half and squeeze it.
Make sure you don't get any of those seeds in there.
I've put in about three-quarters of one lemon.
To that we're going to add tablespoon and a half of flour.
I'm going to eyeball the half.
Raspberries tend to be pretty liquidy, too, so it requires... That little flour helps.
Yep.
Okay, I've got this all mixed up.
Now we're going to cook this and it will naturally thicken the juices.
Get all that good flavor out of there.
We have a tablespoon of butter.
I'm just going to kind of add it in there.
There we go.
This needs to come to a boil so it activates the flour so it thickens it.
It's beginning to boil.
Uh-huh.
How long should it boil?
For a couple minutes because we really want it to thicken those juices.
You got to cook the flour.
You got to cook the flour a little bit.
And if you were to cook all the fruit you wouldn't have much texture at all left.
No.
That's why we do it separately here.
Okay, that's looking good.
That's a nice idea.
You like to retain the shape of the fruit if you can.
All right.
There we go.
I'm just going to set that in the...
Okay, now we'll put the other, reserved fruit in.
This is a very good idea of doing it half and half.
Just toss it a little bit.
Then you get the best of both types.
Exactly.
We're going to taste this-- make sure it has enough lemon and all in it because you can't fix it after it's baked.
That's true.
You got to taste while you're cooking.
You have to leave enough for the pie filling.
Mm-hmm... Mmm...
I think it's just right.
Mm-hmm.
Okay... now we're going to chill this just to room temperature.
We're going to put it over an ice bath which we've got right here.
I'll just bring that... That's a good idea.
This will chill it down fast.
Now we'll roll out the tart shell... how's that?
Yes.
That's good and chilled.
Yep, now it's nice and chilled.
I'm just going to roll this out.
This is a pretty tricky dough in that it wants to fall apart a lot.
Oh, does it keeping cold prevents it from falling apart?
It sure does, it helps it tremendously.
And also, once it gets into the shell you can kind of mend it... you can kind of press it together.
So don't get too worried if we're...
So don't waste a lot of time, huh?
Right.
It's got to be the right thickness... that's our key thing here.
Okay... it's going to be fragile.
Plunge ahead.
Plunge ahead.
I'm going to try to cut it... Oh... cut it in half.
This is how it is.
This is how it works.
This is good for us to see exactly... what happens.
Okay... we will rebuild.
This is rather like a graham cracker crust, isn't it the way you just press it in?
But the fact of rolling it gives you a head start.
It does and it gives you that more even thickness.
I'm just going to kind of add here.
You want to make sure that it is solid because there is so much juice that's created with the raspberries so we're going to go over it with a keen eye... make sure there aren't any holes.
Now we're going to make just a little ledge on the corner there which we're going to attach the lattice top to.
That's looking perfectly fine now.
Mm-hmm...
I'm just going to double-check it.
We have lots of patching material here.
That's why it's useful to see these things done because reading it you wouldn't realize what it would look like while you were doing it.
You'd feel like you did something wrong with the dough but it's just that nature.
Get the little ledge going.
That looks perfect though.
There we go... okay.
Now what we'll do is we'll roll out some lattice stripping.
The lattice topping can be a little challenging also.
That could be even worse?
It could be, so what we're going to do is we're going to work real fast so it doesn't warm up too much.
There we go... Now we're going to cut these strips.
They don't need to be too wide.
Just about like so.
That's about half an inch, do you think?
I think about half an inch.
Just like so...
Okay... these are a little challenging to work with right now so it's better, really, to use some chilled ones.
So I'll just...
I got some chilled ones all ready for us.
Marvelous.
Great, we'll set those right on top.
We're going to fill this with about 2½ cups of fruit.
You want it even with the top of the shell.
Let's see...
I think we got it right there.
You did it!
That was a good... a good eyeballing.
There we go... Kind of flatten it out.
Oh, that's so pretty, isn't it.
Now what we'll do is we got our egg wash here.
One egg beaten with a teaspoon of water.
It is.
We're just going to kind of brush it here so the latticework has a little something to grab to.
And we're just going to start like this and you just kind of crimp it or you just kind of cut it right off there.
With your finger.
With your finger.
And we'll go the opposite... As I can see, it's very wise to chill the strips.
It just warms up sooner and fast.
It works best to paint it as it goes because it's hard to get in and out and around all those little latticeworks.
You could break it.
You learn that from doing it, let me tell you.
Okay, see now this is a good example... so we kind of broke it here.
There we go.
Okay, there we are.
It's really a fragile dough.
Mm-hmm.
You work with speed in this.
Yep.
You did just have enough, didn't you?
I know...
I'm going to have to splice a few together even.
You could make this dough ahead and freeze it, I suppose, can you?
You sure... yeah.
You can freeze your strips on the flat pan then you'd be all ready to go.
Just finish it off there.
Just make sure we didn't miss any areas.
I'm going to put a little turbinado sugar on top.
Now, what's that?
This is a coarse sugar-- it's really beautiful.
It retains its shape when it's cooking.
I'm just going to sprinkle it all over the whole, darn tart.
There we go.
Is that ready to bake?
It is.
Why do we have it on a piece of paper.
This tends to... as it's cooking because it has so much moisture it tends to exude the juices.
Bubble out-- don't want to clean up the oven.
No... and also it makes a big mess on the pan and so this cuts down your cleaning.
Good.
So we'll put this in the oven at like 350.
Probably bake 45 minutes, 40 minutes, something like that.
And we want it like a golden-brown color as well as the juices bubbling-- those are our two keys.
That looks just beautiful.
Now, do you serve it warm or at room temperature?
Actually at room temperature.
You could serve it warm but, um...
But not cold.
Not cold.
You could reheat it, if needed.
Absolutely, yeah.
So I'm going to take off the ring here and then I'm just going to slide it off...
I'm just going to kind of release it with this spatula and then slide it right onto our presentation platter here.
Just like so.
You'd never garnish it with something other than what's inside of it.
Uh-huh.
You wouldn't want to put strawberries on this.
Mint is all right even if it's not in it?
Yeah, even though it's not in it.
That's because that's green... it needs the greenery.
There we go!
That's charming.
Terrific, so... Would you like to try a taste of this?
I certainly would.
Okay, I'm just going to cut a little wedge like so.
That looks... looks lovely.
Let me get you a little whipped cream here.
I'm just going to put a little powdered sugar on the plate.
And, you know, even for this what you could do is you could grab a little garnish and do something like that... okay!
That's charming.
Now there's that lovely crust... the crusty crust.
Mm-hmm.
Delicious crust.
Mmm.
Mmm.
And the filling is lovely.
It just has enough sweetness.
Mmm.
That's the nice thing about using fruit in season.
It's been a wonderful lesson.
And I'm going to make it... tomorrow!
Is that right?
Fantastic!
Thanks ever so much.
It's my pleasure.
We're going to make two rustic tarts today.
One is a fruit tart for dessert and the other one a tomato and cheese tart.
And they're going to be made by Flo Braker and she says they're very quick and easy to do.
They are and what we're going to do is we're going to take one cup of unsifted all-purpose flour.
Just level this across.
Put this in here.
One quarter cup of cornmeal.
Is that just plain, ordinary cornmeal?
Just plain cornmeal.
Doesn't have to be stone-ground... just comes out of a box.
And I add one half-teaspoon of salt and one teaspoon of sugar.
The sugar is more for the color.
And I'm going to mix that together with my pastry blender.
Then the next thing I'm going to do is...
This is made with sour cream which is three level tablespoons of sour cream and then we're going to take five tablespoons of water.
That's about a one- third cup, isn't it?
Exactly, exactly.
I'm going to whisk this together just to combine the two.
What I love about these galettes is that you make one dough and you split it in half and then it makes two different galettes.
One for dessert and one for a picnic.
Absolutely.
And I'm going to use seven tablespoons of butter.
And I'm going to cut them into chunks.
Just cold, unsalted butter.
Cold, unsalted butter because we did put in the salt.
And we're just going to start right away and cutting this in.
And what I'm looking for is a variety of shapes of butter.
Using butter for flavor.
Not all the same?
Not all the same, because if you have little pieces you're going to have that contribute to the tenderness.
And if you have large pieces that's going to contribute to the flakiness.
I think that's about right.
Okay, and you notice how I'm just stirring it sort of, with my pastry blender.
Okay.
And then, we take our sour cream.
And I'm just going to take a little bit at a time.
Now, this, I'm just going to pour in.
And this is, like, eight tablespoons.
I'm going to stir this.
Now, this is kind of thick.
Bit by bit, is that it?
Bit by bit, yes.
Because I don't want to flood an area.
So I'm just going to slowly put this in.
I like to do this little bit by little bit because, as I say, I want to disburse that.
And this you want to be kind of loosely gathered together?
Exactly, but the sour cream-- the acid in the sour cream-- will keep this dough from really getting tough on you.
Okay, now, at this point I'm going to feel it because I'm not going to go by what my recipe says I'm going to go by what I'm feeling.
And you see it is still a little dry... and it really depends upon where you're making this because flours are different.
And so, you have to... Climates are different.
Absolutely.
So you don't go by the recipe, you go by how it feels.
It still is dry.
And now I'm going to just use my hands, again.
I think we're getting there.
And at this point what I'm going to do is bring it together sort of using the contour of the bowl.
And this is not hurting my flour-butter mixture whatever.
Because you're doing it, really, very gently?
Very gently.
Now, at this point, you can just kind of bring it together.
And then, I'm going to cut it in half.
And then...
I'm going to take... some plastic wrap and I'm going to put half of it in here.
And then, at this point, just sort of flatten it.
Do the same with this.
We're going to chill these for about two hours just to have the moisture, sort of, hydrate the flour.
And then it becomes, sort of, a cohesive mixture.
I've rolled the half of dough to an 11-inch circle.
And what we're going to do is lift this up... onto the rolling pin.
And I'm going to put this on one side of the sheet.
Dripping over?
Dripping over, and that's quite all right.
We're going to then make this one our cheese galette.
This is Monterey Jack and mozzarella.
And we're going to just put that in the center here.
How much would you say we're going to put in?
Two ounces of each.
Then what you could do is you could chiffonade your basil, if you wish.
But I think what we'll do is just, sort of, tear it up and put it on.
It's lucky that we can get fresh basil all year round, just about.
Oh, yes, we're very lucky.
Then we're going to take our sliced tomatoes... put that on top.
And these are plum tomatoes?
Plum tomatoes, mm-hmm.
I just am using these because they're a little firmer and that's very nice because it doesn't give out too much moisture.
You don't season them or anything?
Just put them in there.
I put them in here and then what I do is I just pull this up like so...
So that's why you left a bit hanging over?
Yes, yes.
And then just like that.
And you can put a little bit more on top just tear them on top a little bit.
And then, I just bake that as it is, but... first I'm going to roll out the other half of dough.
And again, we're just rolling from the center out... until we get an 11-inch circle.
This one is going to be a berry.
And the reason I'm partial to the berries is I love the colors and also it's very easy because you do not have to, like, start slicing and peeling any fruit.
And, of course, you can, in the fall use pears and apples.
Okay, and then...
Put that back again.
Thank you very much.
Roll this up like so.
Just put it down.
So now, here is a cup and a half of berries.
And you can use any combination that you like.
Strawberries?
Strawberries, I think, are the ones that I don't like to use if I can help it because I think they have a lot of liquid and they don't cook up as well.
Yeah.
Then what we're going to do is take a tablespoon of sugar.
And that will be enough, presumably?
Yes, you really have to taste everything.
But these were sweet and wonderful.
And then we're going to take a little dab of butter.
Put that on top, and that will, sort of add to the flavor and make it glisten.
And, again, we're going to pull up those sides.
Before we put these in the oven I'm going to brush them with a little bit of water.
And then I'm going to sprinkle a little sugar over them.
And the water is just to have the sugar sort of adhere to the dough.
And this is only on... Only on the sweet one.
Only on the sweet one.
Even though, we have a teaspoon of sugar in our dough which just helps with the color.
Then let's just take a little sugar.
And it doesn't have to go on the fruit now just on the area... that sort of makes it glisten and it'll be crispy.
Now they're ready to go into the oven.
What temperature?
400 degrees for about 20 minutes.
Check them and see if they look done and then out they come.
Julia: Oh, my!
Those are beautiful, aren't they?
Flo: Ooh, I think they're done.
Now, how do you tell they're done?
Well, what I'm looking for is, obviously, the color.
I want to feel them; it feels crispy.
And my final test to see if it's done is I like to stick the tip of the knife down through the center and if I feel it's crispy I know it's done.
Or you could use a skewer.
Okay, well, let's have one that's cooled a bit while those others cool.
That's easier to cut it with, isn't it?
Yeah, I always have found these to be very handy.
And I will give you a taste.
Are you going to try one, too?
Absolutely.
Mmm.
I like that very...
It's so much better than a pizza.
Because you have...
I guess, it's the cornmeal in the crust.
Mm-hmm, makes it crunchy.
That's absolutely delicious.
And to think that with this same dough you do both the dessert and the pizza.
Flo, thank you so much.
We always learn so much from you and I hope you'll come again.
I would love it and it's been a wonderful time, thank you.
Julia: Bon appétit!


Support for PBS provided by: